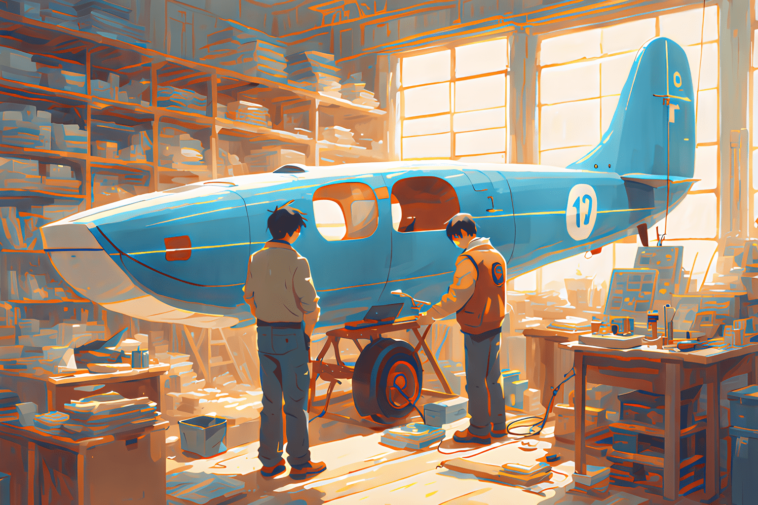

Ever thought about turning your weekend into a thrilling DIY project? Building a homemade hydroplane is a challenge for those who love the sea and adventure!
Building a boat yourself is an exciting chance to make a fast watercraft without spending a lot. The hydroplane design lets you mix engineering with fun on the water.
Building a hydroplane is easier than you might think. With simple tools, a good plan, and a love for marine engineering, you can make a high-speed boat from scratch.
Key Takeaways – How To Build a Hydroplane
- Homemade hydroplane construction requires minimal specialized skills
- DIY boat building can be completed in a few days with basic tools
- Hydroplane design plans are achievable for enthusiastic hobbyists
- Cost-effective project with the chance for fast water fun
- Safety and proper preparation are key for a successful boat build

Understanding Hydroplanes and Their Benefits
Exploring the world of amateur boat making opens up a thrilling area. It’s where boat fans and engineering buffs meet. Hydroplanes are special boats that move fast and cut through water smoothly.
What is a Hydroplane?
A hydroplane is a boat made to cut through water with less resistance. It rides on a small surface area. This lets it go very fast, almost flying on water. Wooden kits for hydroplanes are popular among those who love to build their own fast boats.
Advantages of Building Your Own Hydroplane
- Cost-effective alternative to purchasing pre-built boats
- Complete customization of design and performance
- Personal satisfaction of high-speed boat assembly
- Learning advanced engineering and maritime skills
“The art of building a hydroplane is like creating a personal speed machine that defies water’s natural resistance.” – Anonymous Boat Builder
Overview of Hydroplane Types
| Hydroplane Type | Typical Use | Speed Range |
|---|---|---|
| Mini Hydroplane | Recreational Single Rider | 30-50 mph |
| Racing Hydroplane | Competitive Racing | 100-200 mph |
| Record-Breaking Model | Speed Trials | 200-300 mph |
Building high-speed boats is a great chance for enthusiasts. It lets them make fast, light watercraft that test marine engineering limits. Whether for fun or racing, making your own hydroplane is exciting and fulfilling.
Essential Tools and Materials Needed
Building a hydroplane needs careful planning and the right tools. Whether you’re using plywood hydroplane instructions or looking for affordable materials, having the right tools and safety gear is key. This ensures a successful project.
Before starting, gather all the necessary tools and materials. The right preparation makes building your hydroplane smooth and fun.
Common Tools for Hydroplane Construction
- Power drill with various bit sizes
- Saber saw for precise cutting
- Measuring tape and carpenter’s square
- Sandpaper (multiple grit levels)
- Clamps for securing materials
- Safety utility knife
Essential Materials for Your Project
Choose materials that are durable and water-resistant for your hydroplane. Key items include:
- Marine-grade plywood sheets
- Waterproof epoxy resin
- Fiberglass tape
- Drywall screws
- Foam roller covers
- Pine boards for structural support
Critical Safety Gear Considerations
“Safety first” is not just a saying – it’s essential when working with tools and chemical materials.
- Impact-resistant safety glasses
- Heavy-duty work gloves
- Respiratory protection mask
- Ear protection when using power tools
- Protective clothing
Always put safety first when building a hydroplane. Invest in quality protective gear. Your careful preparation will lead to a successful and safe project.
Designing Your Hydroplane
Creating a hydroplane needs careful thought and precision. DIY boat builders know the design phase is key. It helps make a fast watercraft that cuts through waves well.
Designing a hydroplane means understanding hull shape, weight, and water dynamics. Both pros and hobbyists see that a good design boosts performance a lot.
Choosing the Right Design
When picking a hydroplane design, think about a few things:
- Intended water conditions
- Rider weight and skill level
- Available power source
- Budget for materials
Tools for Designing and Measuring
Key tools for making precise hydroplane designs include:
- Flexible measuring tape
- Drafting triangles
- Pencils and technical drawing paper
- Digital design software
“A great hydroplane design starts with precise measurements and creative vision.” – Professional Boat Designer
Tips for Sketching Your Plans
When sketching your DIY boat, focus on these important parts:
- Symmetrical hull profile
- Precise cockpit positioning
- Accurate dimensional scaling
- Aerodynamic contours
Pro tip: Always make several design versions to improve your hydroplane’s performance.
Unlock the secrets to building your dream boat with MyBoatPlans! With detailed plans for over 518 boats and expert video tutorials, you’ll have everything you need to create your perfect vessel. Click here to begin your journey!
Step-by-Step Construction of the Hull
Building a hydroplane hull needs precision and careful planning. It’s important to master hydroplane hull shaping techniques. This ensures your watercraft glides smoothly across the water’s surface.
Preparing the Hull Materials
Choosing the right materials is your first step when using wooden hydroplane kits. Race boatbuilder Jon Staudacher suggests using specific materials for the best results:
- Two 1″ x 10″ x 14′ long number 2 pine boards
- One 1″ x 10″ x 8′ long number 2 pine board
- Two sheets of 1/4″ lauan plywood
- Group B WEST SYSTEM epoxy
Building the Basic Structure
Building the hull frame requires precision. You’ll need power tools like a saber saw and power drill. Here’s what you need to do:
- Cutting boards to precise measurements
- Beveling top and bottom frame edges
- Using 1″ drywall screws as temporary clamps
- Aligning components carefully
Waterproofing Techniques
Proper waterproofing is key for your hydroplane’s durability and performance. Apply these critical techniques:
| Waterproofing Step | Details |
|---|---|
| Epoxy Coating | Three coats of unthickened resin/hardener mix on all wide surfaces |
| Seam Reinforcement | Use fiberglass tape between deck and bottom |
| Final Protection | Three coats of epoxy on exterior surfaces before painting |
“A well-constructed hull is the foundation of an exceptional hydroplane” – Experienced Boat Builder
Building a hydroplane usually takes three to four days. Patience and attention to detail are key. They will result in a remarkable watercraft that performs exceptionally well.
Creating the Hydroplane’s Engine System
Building a DIY boat means you need to think about the engine system. It’s the heart of your high-speed boat. The right engine can turn your hydroplane into a fast and amazing watercraft.
Selecting an Appropriate Engine
Choosing the right engine is key. You need to think about a few important things:
- How much power you need based on the hull size
- What you plan to use it for (fun or racing)
- Its weight and if it fits with your hull design
Engine Mounting Guidelines
Mounting the engine right is very important. You should add extra plywood to the transom for a strong base. Precision is more important than just being strong when you attach your engine.
“The right engine placement can make or break your hydroplane’s performance.” – Marine Engineering Expert
Electrical Setup and Considerations
A good electrical system is essential for safe and reliable use. You should keep these points in mind:
- Use waterproof wiring connections
- Make sure to ground properly
- Choose marine-grade electrical parts
For those building their own boats, paying attention to these details will make your hydroplane fast and fun to use.
Crafting the Hydroplane’s Flotation Mechanism
Building a good flotation mechanism is key for a homemade hydroplane. It keeps the craft safe, stable, and performs well on water. Knowing how to use effective flotation devices is vital.
Understanding Flotation Requirements
Flotation is more than just staying afloat. It’s about keeping balance and stability in different water conditions. When picking materials for your hydroplane, remember these important principles:
- Calculate the total weight of your hydroplane
- Determine the required buoyancy volume
- Distribute flotation devices evenly across the hull
“A well-designed flotation mechanism is the lifeline of your hydroplane.” – Nautical Engineering Experts
Materials for Flotation Devices
Choosing the right materials is essential for building a hydroplane. Here are some good options:
- Closed-cell foam blocks – Lightweight and water-resistant
- Sealed air chambers integrated into the hull
- Marine-grade expanded polystyrene
Installing the Flotation Mechanism
Installing flotation devices needs precision and planning. Make sure they are securely attached and sealed to keep water out. Where you place them is important for balance and performance.
Download over 500 Boat Plans. Click on the link below.
-->Click Here<--
Waterproofing is very important. Use marine-grade sealants and check all connections many times before you launch. Your goal is to make a strong, reliable flotation system for safe use in different water conditions.
Adding Control Systems for Steering and Stability
Building a high-speed boat needs careful thought about control systems. These systems ensure smooth navigation and top performance. Plywood hydroplane instructions highlight the importance of steering and stability for a safe, responsive boat.
Overview of Control Options
For a successful high-speed boat, choosing the right control system is key. Hydroplane fans have many steering options:
- Manual tiller steering for direct control
- Remote electronic steering systems
- Hydraulic steering mechanisms
- Cable-driven control systems
Manual vs. Remote Steering
Choosing between manual and remote steering depends on your skill and use. Manual steering is simple and direct. Remote steering offers more precision and comfort at high speeds.
“The right control system transforms a good hydroplane into an exceptional racing machine.” – Professional Boat Builder
Balancing the Hydroplane
Getting the hydroplane perfectly balanced is essential. Important steps include:
- Precise weight distribution
- Installing 3/4″ strakes along hull stringers
- Adjusting control surfaces for optimal handling
- Minimizing lateral movement during high-speed runs
Good control systems make your hydroplane safe and efficient in different water conditions.
Finishing Touches and Aesthetic Considerations
Once you’ve built the structure of your wooden hydroplane kits, it’s time to make it look amazing. The right finishing touches can make your DIY boat truly stand out. It will be a beautiful sight on the water.
Painting and Finishing Options
Painting your boat needs careful prep and skill. Use marine-grade enamel paint for its durability and water protection. Here are some tips for painting:
- Sand surfaces well before painting
- Apply primer for better paint adhesion
- Apply thin coats for best results
- Let each coat dry fully before adding more
Adding Decorative Features
Make your wooden hydroplane unique with creative designs. Add custom graphics, racing stripes, and team logos. It will turn your boat into a work of art.
Ensuring Visibility on Water
When you’re out on the water, safety and visibility are key. Choose bright colors that stand out against the water. Also, think about using reflective materials for better visibility in all light conditions.
“A well-designed hydroplane is not just about performance, but also about making a statement on the water.”
| Color | Visibility Rating | Best Use |
|---|---|---|
| Bright Orange | Excellent | High contrast in most water conditions |
| Fluorescent Yellow | Very Good | Daytime visibility |
| White with Reflective Strips | Good | Low-light environments |
Apply a clear coat to protect your paint and designs. It’s very important for boats in rough water.
Testing and Troubleshooting Your Hydroplane
After you finish building your homemade hydroplane, it’s time for the testing phase. Experts with years of experience say it’s key to check your boat carefully. This ensures it runs safely and well.
Start by choosing a calm spot of water for your first tests. This lets you see how your hydroplane handles. Look for any signs of trouble, like wobbly parts or uneven steering.
Wear safety gear during these tests. It’s important to stay safe while you’re checking your hydroplane. Even small changes can make a big difference in how it performs.
Some common problems include vibrations, steering issues, or uneven weight. Experts suggest fixing these problems step by step. Strengthen weak spots, adjust the controls, and make small changes. Being patient here is key to a good hydroplane.
Building a boat is a learning journey. Each test run teaches you something new. Keep track of what you learn, make smart changes, and test again. Your hard work will pay off, turning your design into a fast and reliable boat.
FAQ – How To Build a Hydroplane
How long does it take to build a hydroplane at home?
Building a hydroplane can take a few days to a week. It depends on your skill level and the design’s complexity. Most hobbyists can finish a basic hydroplane in 3-5 days with consistent effort.
What are the essential tools needed for hydroplane construction?
You’ll need a saber saw, power drill, and measuring tape. Also, flexible battens, hand tools, and epoxy application tools are important. Don’t forget safety gear like protective eyewear and gloves. Having basic woodworking skills and a well-equipped workshop helps a lot.
What type of engine is best for a home-built hydroplane?
A 5-15 HP outboard motor is best for mini hydroplanes. The engine choice depends on the boat’s size, use, and rider weight. Smaller boats use lightweight engines, while racing boats need more power.
How much does it cost to build a DIY hydroplane?
Costs vary from $300 to $1,500, based on materials, engine, and design. A basic wooden hydroplane with a small motor costs about $500-$700.
Is building a hydroplane safe for beginners?
Yes, beginners can build a hydroplane safely with precautions. Adult supervision is a must, mainly when using power tools and epoxy. Always wear protective gear and follow instructions carefully.
What materials work best for hydroplane construction?
Plywood, usually marine-grade, is the most common material. Pine boards are good for framing. You’ll also need epoxy resin, fiberglass tape, drywall screws, and foam roller covers for finishing.
How do I ensure my homemade hydroplane is water-safe?
Waterproofing is key. Use multiple epoxy resin coats and fiberglass tape for seams. Make sure all joints are sealed. Add flotation devices and test in calm waters with a Coast Guard-approved life vest.
Can I customize the design of my hydroplane?
Yes! Building your own hydroplane lets you customize design, size, and performance. You can adapt plans or create a unique design based on your needs and preferences.
What are the most common challenges in building a hydroplane?
Challenges include achieving hull symmetry, waterproofing seams, balancing the boat, and mounting the engine. Careful measuring, patience, and attention to detail are essential to overcome these challenges.
Do I need special skills to build a hydroplane?
Basic woodworking and DIY skills are helpful but not necessary. Many hobbyists build hydroplanes with research, following plans, and learning techniques. Online tutorials and local workshops can help develop the needed skills.